
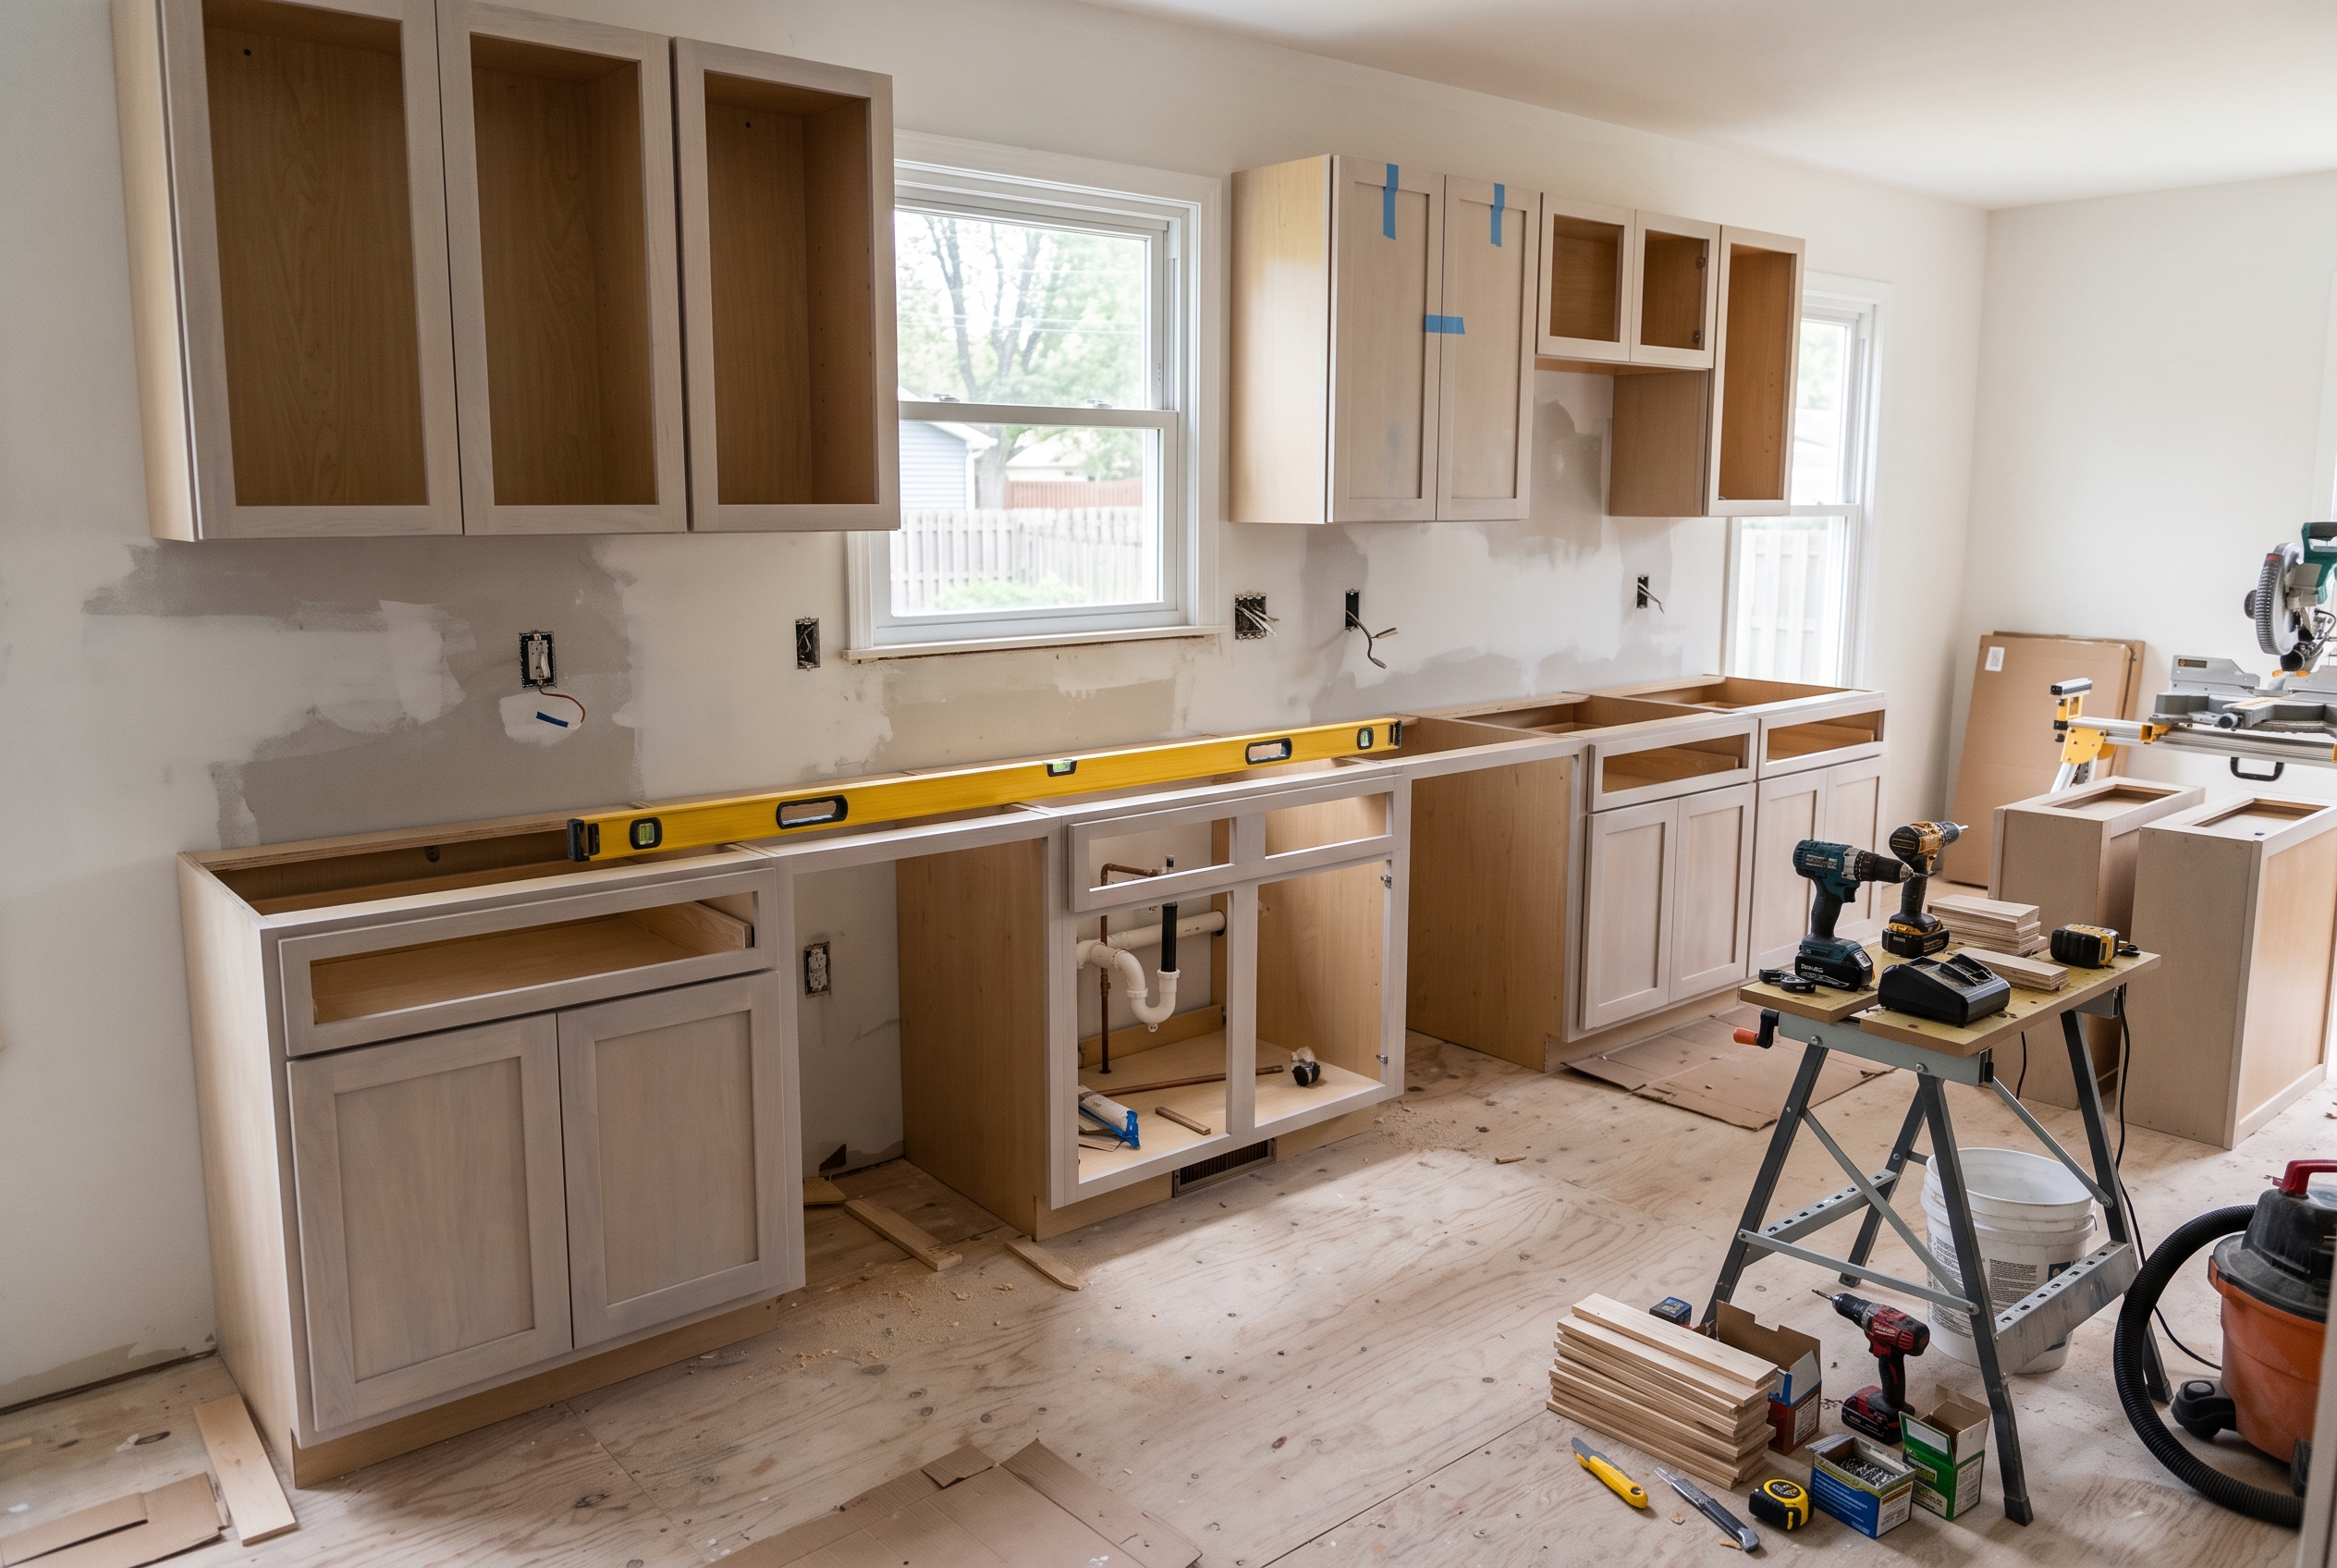
Setting a kitchen's worth of cabinets usually takes a crew two to five working days. The countertops follow about two weeks later, once every base is level and fastened and the top has been measured and cut. Your part comes first: an empty kitchen, a temporary place to make coffee and a few decisions settled while the cabinets are still on order.
What to Do Before Install Day
Most of what makes cabinet installation go smoothly happens before the crew arrives. Your job is to empty the kitchen, make room to work and settle the choices that can't change once the cabinets are on the wall.
- Empty every cabinet, drawer and countertop a week ahead, and mark one box for the things you use daily.
- Clear a path from the door to the kitchen, plus a place for the crew to stage boxes and cut, like the garage or an empty room.
- Settle the appliances, down to the exact range, refrigerator, dishwasher and hood, with their spec sheets. Each opening is built to fit them.
- Choose the sink and faucet now, since the countertop is cut around them.
- Pick the knobs and pulls and decide where they go, so they're drilled once.
- Settle the floor. Whether the new floor runs under the cabinets or stops at their toe kicks depends on the floor.
- Plan where pets and small children will be, and expect the water and power to the kitchen to be off for parts of the job.
Expect dust and noise for the first few days. Sealing the kitchen doorway with plastic sheeting and closing the furnace registers in the room keeps most of the dust from traveling through the house.
Setting Up a Temporary Kitchen
A temporary kitchen carries you through the stretch without a sink, which lasts until the countertops are in and the plumbing is reconnected. With stone tops, that's often two to three weeks. Set it up in a dining room, laundry room or basement with an outlet. The refrigerator can move there if it fits, along with a microwave, a coffee maker, a kettle or toaster oven and a folding table.
Wash dishes in a laundry or bathroom sink, and plan on paper plates for the busy days. A plastic tub for dirty dishes and a drying rack on a towel make it bearable, and a few meals out are worth budgeting for.
Keep a box of daily essentials within reach: the coffee, a good knife, one pan, the kids' cups. Label everything else by cabinet, and unpacking goes fast when the kitchen is back.
When the Cabinets Arrive Before the Crew
If your cabinets are delivered before install day, keep the boxes inside the heated, dry part of the house, flat and closed, until the crew opens them. Wood takes on and gives up moisture with the air around it. A January garage or a damp basement in August is the worst place for cabinets to wait.
Count the boxes against the order when they arrive, and look each one over for crushed corners or punctures. A damaged box is easier to sort out the day it arrives than the day it's opened on the wall, and a replacement cabinet can take weeks.
What Happens on Day One
What happens on day one of cabinet installation is usually removal and layout. The old cabinets and countertops come out if they're being replaced, the walls get patched where they came off, and any plumbing or wiring that's moving is roughed in before a new box goes up.
Then the crew maps the room. They find the studs, which carry every screw, and the highest point of the floor, measured down from a level laser or chalk line in several spots. From that high point they strike a level line on every wall, about 34 1/2 inches up for a standard 36-inch counter. The whole kitchen is set to that line.
This is the loudest, dustiest day. It's also the day the crew learns what the walls are hiding, like a crooked wall, a soft spot in the floor or wiring where a cabinet back goes. In an older house, a schedule with a little slack in it is a good idea.
How the Cabinets Go In
During installation, the cabinets are set to that level line, shimmed wherever the floor or wall drifts, and screwed into the studs and to each other. Then they're fitted to the walls with fillers and trim. Doors, drawers and hardware go on last.
Wall Cabinets or Base Cabinets First
Most crews hang the wall cabinets first. With no base cabinets in the way, the installer can stand close to the wall and rest each box on a level board screwed to the studs along the layout line. Then it's fastened without reaching over anything. Some crews set the bases first instead, when the counter height needs to be fixed early.
Either order works, because both rows are set from the same level line. What matters to you is the result: wall cabinets that line up with each other, bases level enough for a stone top, and an even space between the two.
Leveling on an Uneven Floor and Fitting Crooked Walls
Uneven floors and crooked walls are normal, especially in older Lincoln houses, and a good installation hides them. Every cabinet is set to the line struck from the floor's highest point, so the crew shims the lower spots up to it and never cuts a cabinet down. The shims sit under the box, hidden behind the toe kick.
A wall that leans or waves gets the same care. The filler strip or finished end panel at the end of a run is scribed, which means traced to the wall's shape and trimmed until it meets the wall with no gap. Framed cabinets have a face frame that can be trimmed for a tight fit. Frameless cabinets don't, so they need a more exact layout, and some sit on adjustable legs.
When it's done right, you won't notice any of it. The gaps around every door and drawer are even, the tops of the bases form one level plane, the wall cabinets line up across the top, and there's no daylight where a cabinet meets a wall. A crooked room takes longer to set, and that time shows in the finished kitchen.
Islands, Tall Pantries and Appliance Openings
Islands are fastened to the floor, not just set on it. The usual method is wood cleats screwed to the subfloor in the island's footprint, with the cabinets slipped over them and screwed to the cleats, so the island won't shift when someone leans on it.
Tall pantry and oven cabinets are screwed into the studs top and bottom so they can't tip, and wall runs are fastened to studs through their backs. Each appliance opening is checked against its spec sheet as it's built. That covers the dishwasher's width and height, the range's width, and the refrigerator's width and depth with room for its doors to swing. It's why the appliance models have to be settled before install day.
If the floor is changing too, plan the dishwasher opening around the new floor's height. Otherwise the dishwasher can end up trapped under the counter the first time it needs to come out.
Doors, Drawers, Hardware and Trim
Doors and drawer fronts usually come off during installation and go back on at the end, each on its own cabinet. Then each one is adjusted until the gaps are even and the doors close softly. Knobs and pulls are drilled from a template, so they line up across the run.
Crown molding along the top, light rail under the wall cabinets and toe kicks across the bottom finish the run, with end panels and fillers where it stops. A thin bead of caulk closes the line where a cabinet meets a wall.
When the Countertops Come In
Stone and quartz countertops are measured only after the base cabinets are fastened, level and in the same plane, and they're installed about two weeks later. Cambria, one of the quartz makers we carry, asks for the cabinets to be permanently installed before its measuring visit, which takes about an hour. Its fabrication then takes about two weeks, and installation two to five hours.
Have the sink and faucet on hand for the measuring visit, along with the appliances or at least their model numbers, because the cutouts are made from them. Whether the top is quartz, natural stone or solid surface, it's cut to fit the cabinets as they actually stand. We template and install countertops ourselves, so the seams land where they belong.
Once the top is in, the sink and faucet are hooked up and the dishwasher and range go back in. The backsplash comes last, usually a day or two of tile work. Until the plumbing is reconnected, the temporary kitchen is still your kitchen.
How Long Cabinet Installation Takes
From the day the old cabinets come out to the day the sink works again, a kitchen's cabinet installation usually takes two to three weeks. The cabinets themselves are set in a few working days. Most of the rest is the countertop, which can't be measured until the cabinets are fixed and then takes about two weeks to make.
| Stage | Typical time | What you'll notice |
|---|---|---|
| Removal and repairs | About a day | Noise, dust, patched walls |
| Layout and cabinets set | Two to five days | Boxes up, doors off |
| Doors, hardware and trim | About a day | It starts to look finished |
| Countertop measure | About an hour | Sink and faucet on hand |
| Countertop fabrication | About two weeks | No sink; temporary kitchen |
| Countertop install | Two to five hours | Heavy lifting, a few scuffs |
| Plumbing and backsplash | One to three days | Water back on |
A bathroom vanity or a laundry wall usually takes a day. A large custom kitchen with an island can take a crew a full week to set before the countertop clock even starts.
Walls that need more repair than expected stretch the schedule, and so do plumbing or wiring that moves, a crooked room, inset doors or custom fitting. A damaged cabinet that has to be replaced adds days too. The weeks before any of this, while your cabinets are built, depend on the line you choose: a standard-size line made for quick delivery can arrive within a few weeks, while semi-custom and custom cabinets take longer.
If you're aiming for a date, like a holiday dinner or a graduation party, count back from it. Leave the countertop's two weeks, a few days for the cabinets, a little slack for surprises, and the cabinets' own lead time before that. Book the plumber's hookup and the backsplash work for the days right after the countertop goes in, so the kitchen isn't waiting on one last trade.
What Cabinet Installation Costs
Nationally, HomeAdvisor's survey of homeowners' project costs puts the labor to hang cabinets at $50 to $450 per linear foot, depending on the cabinet type. Taking out the old cabinets adds about $350 to $800, or up to $1,000 in a large kitchen. The average kitchen has about 24 linear feet of cabinets.
| Item | National range | Notes |
|---|---|---|
| Labor to hang cabinets | $50 to $450 per foot | $1,200 to $10,800 for 24 feet |
| Removing old cabinets | $350 to $800 | Up to $1,000 in a large kitchen |
| New hardware | $2 to $50 a piece | Times every door and drawer |
| Drywall patching | $300 to $900 | When walls are opened |
| Plumber or electrician | $45 to $200 an hour | Only when lines move |
Where your kitchen lands in that range depends on how many cabinets there are, how complicated the layout is, how crooked the room is and what kind of cabinet you chose. Corners, an island and tall units take longer. Inset and custom cabinets take longer still, because each door and filler has to be fitted by hand. Crown molding, light rail and panels add time too.
Installation usually covers setting, leveling and fastening the cabinets and hanging and adjusting the doors and drawers. It also covers the hardware, fillers, toe kicks and trim. The cabinets themselves, the countertops, the backsplash, any plumbing or electrical moves and drywall repair are usually priced separately. When you compare two installation quotes, put them side by side line by line, and check that each one includes the same removal, trim and hardware work before you compare totals.
We price installation together with your cabinets after we've measured the room.
The Walkthrough Before You Sign Off
Before you sign off on new cabinets, walk the kitchen with the installer and open everything. We finish with a walkthrough so you sign off on the details, and these are the things to check:
- Every door opens and closes without rubbing, and soft-close doors slow themselves.
- The gaps around doors and drawers look even, and side-by-side doors line up at top and bottom.
- Every drawer runs all the way out and back smoothly.
- The base cabinets are level, checked with a level on top before the counter goes on.
- The island doesn't move when you push on it.
- Fillers and end panels meet the wall with no gap, and caulk lines are neat.
- Toe kicks, crown and light rail are on, with tight corners.
- No dents, scratches or chips on doors, panels or end caps.
- Shelves, shelf pins, hardware and pull-outs are all there.
- The dishwasher, range and refrigerator openings fit their appliances.
Point out anything you see while the crew is there. Small adjustments take minutes on the spot. A missing part or a damaged door means a reorder, and the sooner it's on the list, the sooner it arrives.
Adjusting Doors and Drawers After Installation
A cabinet door that drifts out of line, rubs its neighbor or stops closing softly usually needs a hinge adjustment, not a repair. Wood moves with the seasons, so a door set perfectly in August can shift a little once the furnace dries the house in January, and loaded doors settle in their first months.
Most cabinet doors hang on concealed hinges that adjust three ways. One screw on the hinge arm moves the door left or right, which evens the gap between two doors. Another moves it in or out, so it sits flush with its neighbors.
Height is set at the mounting plate on the cabinet side, by loosening its screws or turning a cam, so the door lines up with the one beside it. Turn each screw a quarter turn at a time and test the door after each change. Drawer fronts have their own adjusters, or screws from inside the drawer box, to raise, lower or straighten them.
Steady indoor humidity cuts down on the drift. Koch recommends 35 to 45 percent relative humidity for its cabinets, and a furnace humidifier keeps a Lincoln house closer to that in winter.
When adjusting doesn't hold, the problem is somewhere else. A stripped screw hole that won't grip, a cabinet box that has moved out of level, a countertop seam that has opened or water at the sink base are all worth telling us about, especially in the first year.
Vanities, Laundry Rooms and Mudrooms
A bathroom vanity, a run of laundry cabinets or a mudroom bench follows the same installation steps as a kitchen on a shorter clock, usually a day. The difference is in what each room brings: plumbing behind a vanity, machines under laundry cabinets and a lot of weight on mudroom hooks.
A vanity's drain and water lines have to line up with the openings in its back, so the plumbing is checked before the vanity is set. The top and faucet follow once it's fastened. Laundry wall cabinets go high enough to clear the washer and dryer lids when they open, with room left for the dryer vent. Mudroom benches and lockers are screwed to the studs, because the hooks end up holding heavy coats, backpacks and the occasional child.
We design and install vanities, laundry and mudroom cabinets as well as kitchens, with the same level lines and the same screws into studs.
Cabinet Installation With Us
At Cascade Cabinets & Flooring, our certified installers set the cabinets we sell, from design to installation. Our steps run from consultation and measurements through design and product selection, ordering, removal of the existing cabinets if needed and preparing the space, to installing the cabinets and final adjustments.
We design the kitchen in 3D before anything is ordered, so the layout you approve is the one that goes on the wall. If new cabinets are part of a full remodel, we plan and install the countertops and floors with them as one kitchen remodel.
Cabinet doors and finishes are on display at our showroom at 4800 N 57th St in Lincoln, open weekdays from 8 to 5.
Other Questions About Cabinet Installation
Can I Install Kitchen Cabinets Myself?
You can install a single vanity or a run of laundry cabinets yourself if you're handy with a level, a stud finder and a drill, and you have a helper for the lifting. A whole kitchen is a different job. The bases have to be level and in one plane for a stone top to be measured, the island has to be anchored and every appliance opening has to fit. A small error early shows up later in the countertop and the doors.
If you do it yourself, follow the maker's instructions for your line, set everything from a level line struck at the floor's high point, fasten into studs, and wait to have the countertop measured until every base is fixed. Quartz tops are another matter, since Cambria recommends its own network of fabricators and installers and says installing its quartz isn't a do-it-yourself job.
Do You Paint the Walls Before the Cabinets Go In?
Yes, paint the walls before the cabinets go in, at least the primer and a first coat, and touch up after. That way nobody cuts in around new boxes or tapes over a fresh finish, and the walls behind the cabinets don't need a finish coat at all.
Hold the final coat until the cabinets, trim, caulk and backsplash are done. Installation scuffs walls, and crown molding, light rail and caulk all leave lines that a last coat covers.
Getting Your Cabinets Measured and Scheduled
The surest way to know your own timeline is to start with the room: its walls, its floor and the date you're aiming for. Bring your plans and photos, or let us look at the space ourselves. Request a consultation, and we'll come measure and plan the order of work with you.